This post is mostly based on this Gist made by madkoding. While the guide is great and will provide slightly more details, as well as a host of comments to debug with, my post will be more refined and concise on how I did it personally.
My machine happens to be in the ideal state (one receiver, one device to pair), so just note that this may not be the case for you.
Recently, I built a new computer; my first in a while. It’s prime purpose was to run a proper dual boot of PopOS (for development) and Windows (for gaming).
On separate SSDs with high quality components, booting between the two with rEFInd has been fantastic.
Unfortunately, my choice to use bluetooth headphones has been a malady on the experience, causing me to attempt to reconnect and re-pair them each time I switch OSes.
The issue is that the MAC address of my Bluetooth receiver is identical, but the pairing keys aren’t shared naturally between my two operating systems. Only one pairing key can exist for a given MAC address inside my headphones.
That said, with a couple of commands and a brief understanding of MAC addresses, it isn’t hard to ensure consistent pairing on both your Linux and Windows installations.
The whole process comes down to copying the pairing key (a token that verifies a previous pairing exists) from Windows to Linux. The reverse process can be figured out by reading this guide carefully.
Finding Your Pairing Key
On Windows, the pairing key is located in your registry - but don’t worry, we can access the registry entirely from within Linux.
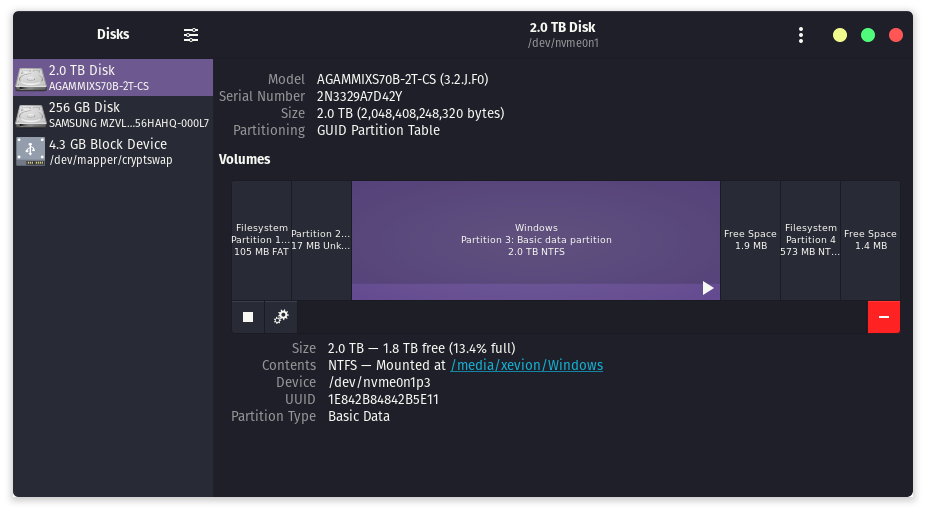
You’ll need to make sure your Windows disk is mounted. Mine was super easy to mount, all through a nice comfortable GUI.
- Use the little triangular play button on the left and click it.
- It should transform into a square stop button (as shown in the screenshot).
- The path it is mounted at will be shown in the GUI (for example,
/media/xevion/Windows).
You’ll need to install chntpw, a utility for resetting NT passwords and editing registry entries.
- On my Ubuntu machine, I ran
sudo apt install chntpw. - Otherwise, you can look at this page to find detailed instructions for every distribution and version.
Next, we’ll use chntpw to access your Window’s registry
- Navigate to
$WINDOWS/Windows/System32/config - Execute
chntpw -e SYSTEM - This will place you in a special shell (with shell-like commands). To learn more, type
?in the shell. - Do note, this shell is not very friendly - arrow keys, CTRL+C and various other common bindings won’t work too well. It can freeze up easily.
Now, we navigate to your Bluetooth registry keys
- In the shell, execute
cd \ControlSet001\Services\BTHPORT\Parameters\Keys. - In this directory, you can type
lsto list the devices your Windows device had access to.
You probably only have one, like me:
(...)\Services\BTHPORT\Parameters\Keys> ls
Node has 1 subkeys and 0 values
    key name
    <bcc7469bd01e>
If you have more than one, it may be a good idea to identify which one you used to connect with on Windows. You can use hcitool to list your Bluetooth MAC addresses:
❯ hcitool dev
Devices:
    hci0	BC:C7:46:9B:D0:1E
Do remember this value; it will be referenced as $PC_MAC later.
The formatting difference here between the Windows registry and Linux is common throughout the process. I assume the reason is because a colon (
:) is not a legal character in the Windows filesystem. That said, the casing difference I cannot speak to…
This subkey holds all the pairing keys for the devices it’s paired with.
- Navigate to it with
cd, such ascd bcc7469bd01e
You can list all entries again with ls:
(...)\BTHPORT\Parameters\Keys\bcc7469bd01e> ls
Node has 0 subkeys and 1 values
  size     type              value name             [value if type DWORD]
    16  3 REG_BINARY         <acbf7166feb2>
Once again, the value shown here is important, it will be referenced as $DEVICE_MAC later.
Additionally, they key inside is important too - the value you see in ls is only the MAC address of the device you paired with on Windows.
If you have multiple keys here, you can confirm in different ways. On my Ubuntu-style machine, I have access to Blueman, a Bluetooth Device Manager, where it shows the MAC address up front.

If you don’t have that or can’t use it, you can also view MAC address on your phone usually. For example, on my Google Pixel, my paired device’s address can be seen at the bottom.
Now that you have your device’s MAC address, you can read out the pairing key with cat:
(...)\BTHPORT\Parameters\Keys\bcc7469bd01e> cat acbf7166feb2
Value <acbf7166feb2> of type REG_BINARY (3), data length 16 [0x10]
:00000  65 04 BB 3B 6F 3C 5D CE AD 9F B7 2C 63 E3 15 9C H.&..>.{...Q..z3
This may look like a lot, but don’t worry, it’s just a hex dump of the pairing key, all we have to do is copy the string in the middle (the 16 bytes) and we’re done.
Make sure to not copy the last portion, H.&..>.{...Q..z3, as it’s the ASCII representation of the hex dump.
Copying the Pairing Key into Linux
This next step is super easy, all we have to do is find the file that holds the pairing keys for your Bluetooth devices.
The specific file we’re looking for is /var/lib/bluetooth/$PC_MAC/$DEVICE_MAC/info, where $PC_MAC is your computer’s MAC address and $DEVICE_MAC is the device’s MAC address.
That said, the form of the MAC address is different between Windows and Linux. For example,
- My
$PC_MACon Linux isBC:C7:46:9B:D0:1E, but on Windows it’sbcc7469bd01e. - My
$DEVICE_MACon Linux isAC:BF:71:66:FE:B2, but on Windows it’sacbf7166feb2. - Technically, this is just a formatting difference, but it’s important to note.
Since /var/lib/bluetooth/ is entirely owned by root, you’ll need to use sudo to edit the file. I used micro to edit the file, but you can use nano or vim if you prefer.
- If you want to
cdinto the directory, you can usesudo -sto get a root shell, thencdinto the directory. This is dangerous, so be careful. - A safer, but somewhat slow way of exploring would be to use
sudo ls -l /var/lib/bluetooth/$PC_MAC.
If you’re not interested in exploring, know your MAC addresses and just want to find the file, you can use find:
$ sudo find /var/lib/bluetooth -name info
/var/lib/bluetooth/BC:C7:46:9B:D0:1E/AC:BF:71:66:FE:B2/info
Once you’ve found the file, open it with sudo and your favorite text editor. You’ll see a file that looks like this:
[General]
Name=Maestro
Class=0x240418
AddressType=public
SupportedTechnologies=BR/EDR;LE;
Trusted=true
Blocked=false
Services=(hidden)

[DeviceID]
Source=1
Vendor=158
Product=16441
Version=848

[LinkKey]
Key=48F826B9E93EAF7B9494C951A5E47A33
Type=4
PINLength=0
The only thing you need to do is replace the Key value with the pairing key you copied from Windows.
Once done, save the file and restart the Bluetooth service with sudo service bluetooth restart.
You should now be able to connect to your device without having to re-pair it. I personally recommend restarting your device as well, just to be sure.